How do I set up AWS S3 for warehouse sync?
Last updated: September 22, 2025
The AWS S3 sync allows you to export your data into an S3 bucket in your own AWS account. The S3 sync uploads a full load of your customer data with every run, so the latest partition uploaded will contain all of your account's data. The latest unload will reflect whatever schema is configured on your warehouse sync page and the data is stored in parquet format.
Pylon uses IAM credentials to temporarily assume role in your AWS account and write data into your S3 bucket. Below are the steps required to set up the S3 sync.
AWS Setup
We have a AWS CloudFormation template that will automatically create the AWS resources required for S3 warehouse sync. You can download that here:
Otherwise, the manual resource setup is detailed below.
IAM Policy
You will need to create an IAM policy with necessary S3 write permissions, to allow Pylon to unload the data into your account's S3 bucket.
{
    "Version": "2012-10-17",
    "Statement": [
        {
            "Effect": "Allow",
            "Action": [
                "s3:PutObject",
                "s3:PutObjectAcl",
                "s3:ListBucket",
                "s3:GetBucketLocation"
            ],
            "Resource": [
                "arn:aws:s3:::{your-bucket-name}",
                "arn:aws:s3:::{your-bucket-name}/*"
            ]
        }
    ]
}
IAM Role
Next you will create a new IAM Role with an AWS account trusted entity type. Select "Another AWS account" and enter the Pylon service account ID:
825765419603
We also require an external ID, which you can supply here under Options. This external ID is a key that you will supply to our client for an extra layer of security.
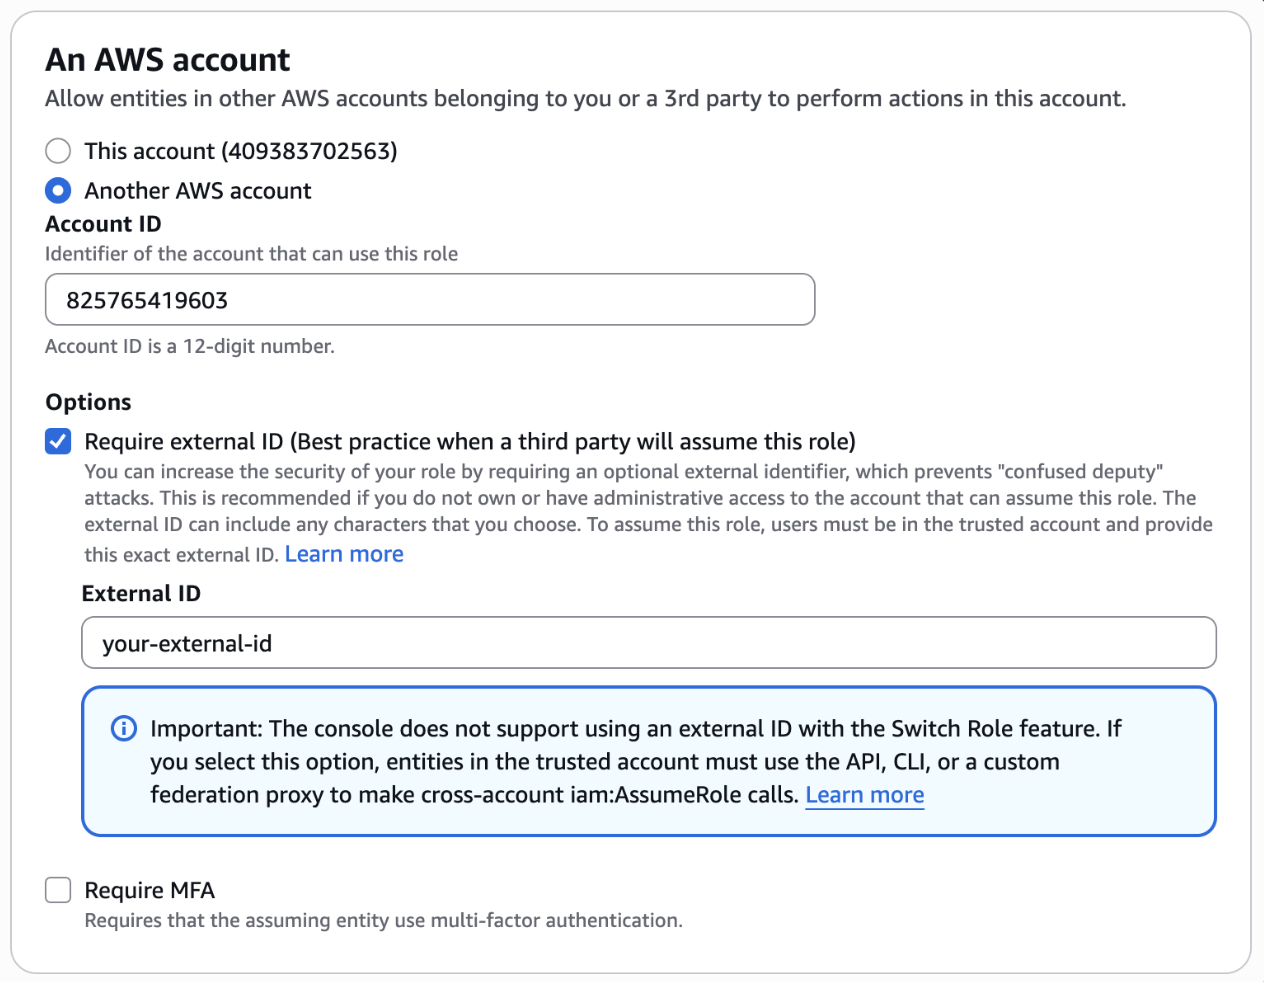
Attach the policy you just created above to this role.
You'll need to ensure that the IAM role has STS assume role permissions so that the Pylon account can assume this role. The trust policy should look something like the following:
{
    "Version": "2012-10-17",
    "Statement": [
        {
            "Effect": "Allow",
            "Principal": {
                "AWS": "arn:aws:iam::825765419603:root"
            },
            "Action": "sts:AssumeRole",
            "Condition": {
                "StringEquals": {
                    "sts:ExternalId": "{your-external-id}"
                }
            }
        }
    ]
}
Now you are ready to create an S3 sync in Pylon.
Pylon Setup
Install the S3 App from the Apps Directory.
Click Create to create a new sync and supply the resources that you have set up above. Ensure you save the settings.
After the sync is created, be sure to toggle on the sync so that it is connected and enabled.