How to migrate your tickets to Pylon with the Data migration tool
Last updated: November 20, 2026
The Data migration tool lets you import your ticket history from another help desk yourself. You connect your old help desk, choose which tickets to bring over, map their fields to Pylon, preview the result, and start the import. Imported tickets are searchable in Pylon, and Pylon's AI can learn from them.
Safe to run in a live workspace. An import never messages your customers or runs your automations, and imported tickets arrive as read-only history. See What an import won't do below.
Before you start
Pylon admin access. Only admins can open Settings > Data migration.
Admin access to your old help desk, to approve the connection or create an API token with the right scope.
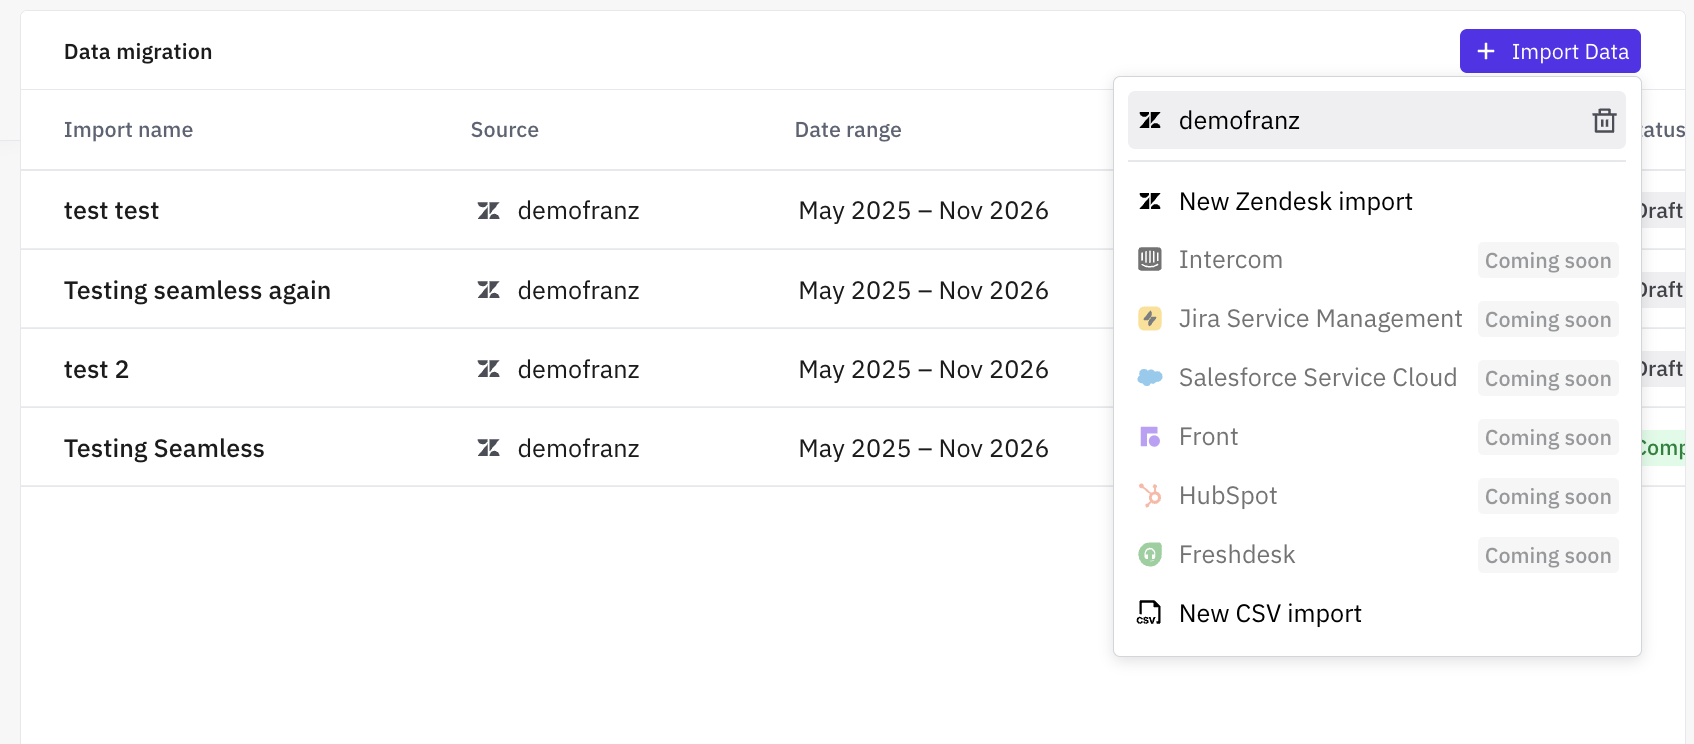
A supported help desk: Zendesk, Intercom, Jira Service Management, Salesforce Service Cloud, Front, HubSpot, or Freshdesk. You can also upload a CSV file.
Using a help desk that isn't listed? Reach out to your Pylon team to talk through options.
Step 1: Connect your help desk
Go to Settings > Data migration and click Import Data.
Choose New [your help desk] import.
Enter the details your help desk needs (see the table below) and connect.
Help desk | What you need to connect |
Zendesk | Click Sign in with Zendesk (recommended) and approve access in Zendesk. Or use your Zendesk subdomain, an admin email, and an API token. |
Intercom, Front | An access token |
HubSpot | A service key |
Jira Service Management | Your Atlassian site, an admin email, and an API token |
Salesforce Service Cloud | Your My Domain, plus a Connected App's consumer key and secret |
Freshdesk | Your Freshdesk subdomain and an API key |
CSV | Your CSV files |
The connect screen links to setup instructions. Once connected, your help desk appears at the top of the Import Data menu, so you can start more imports from it later.
Step 2: Choose which tickets to import
Give the migration a name. The name also becomes the default tag for the imported tickets (see Step 4).
Set the date range. Tickets are retrieved based on the the date they were created.
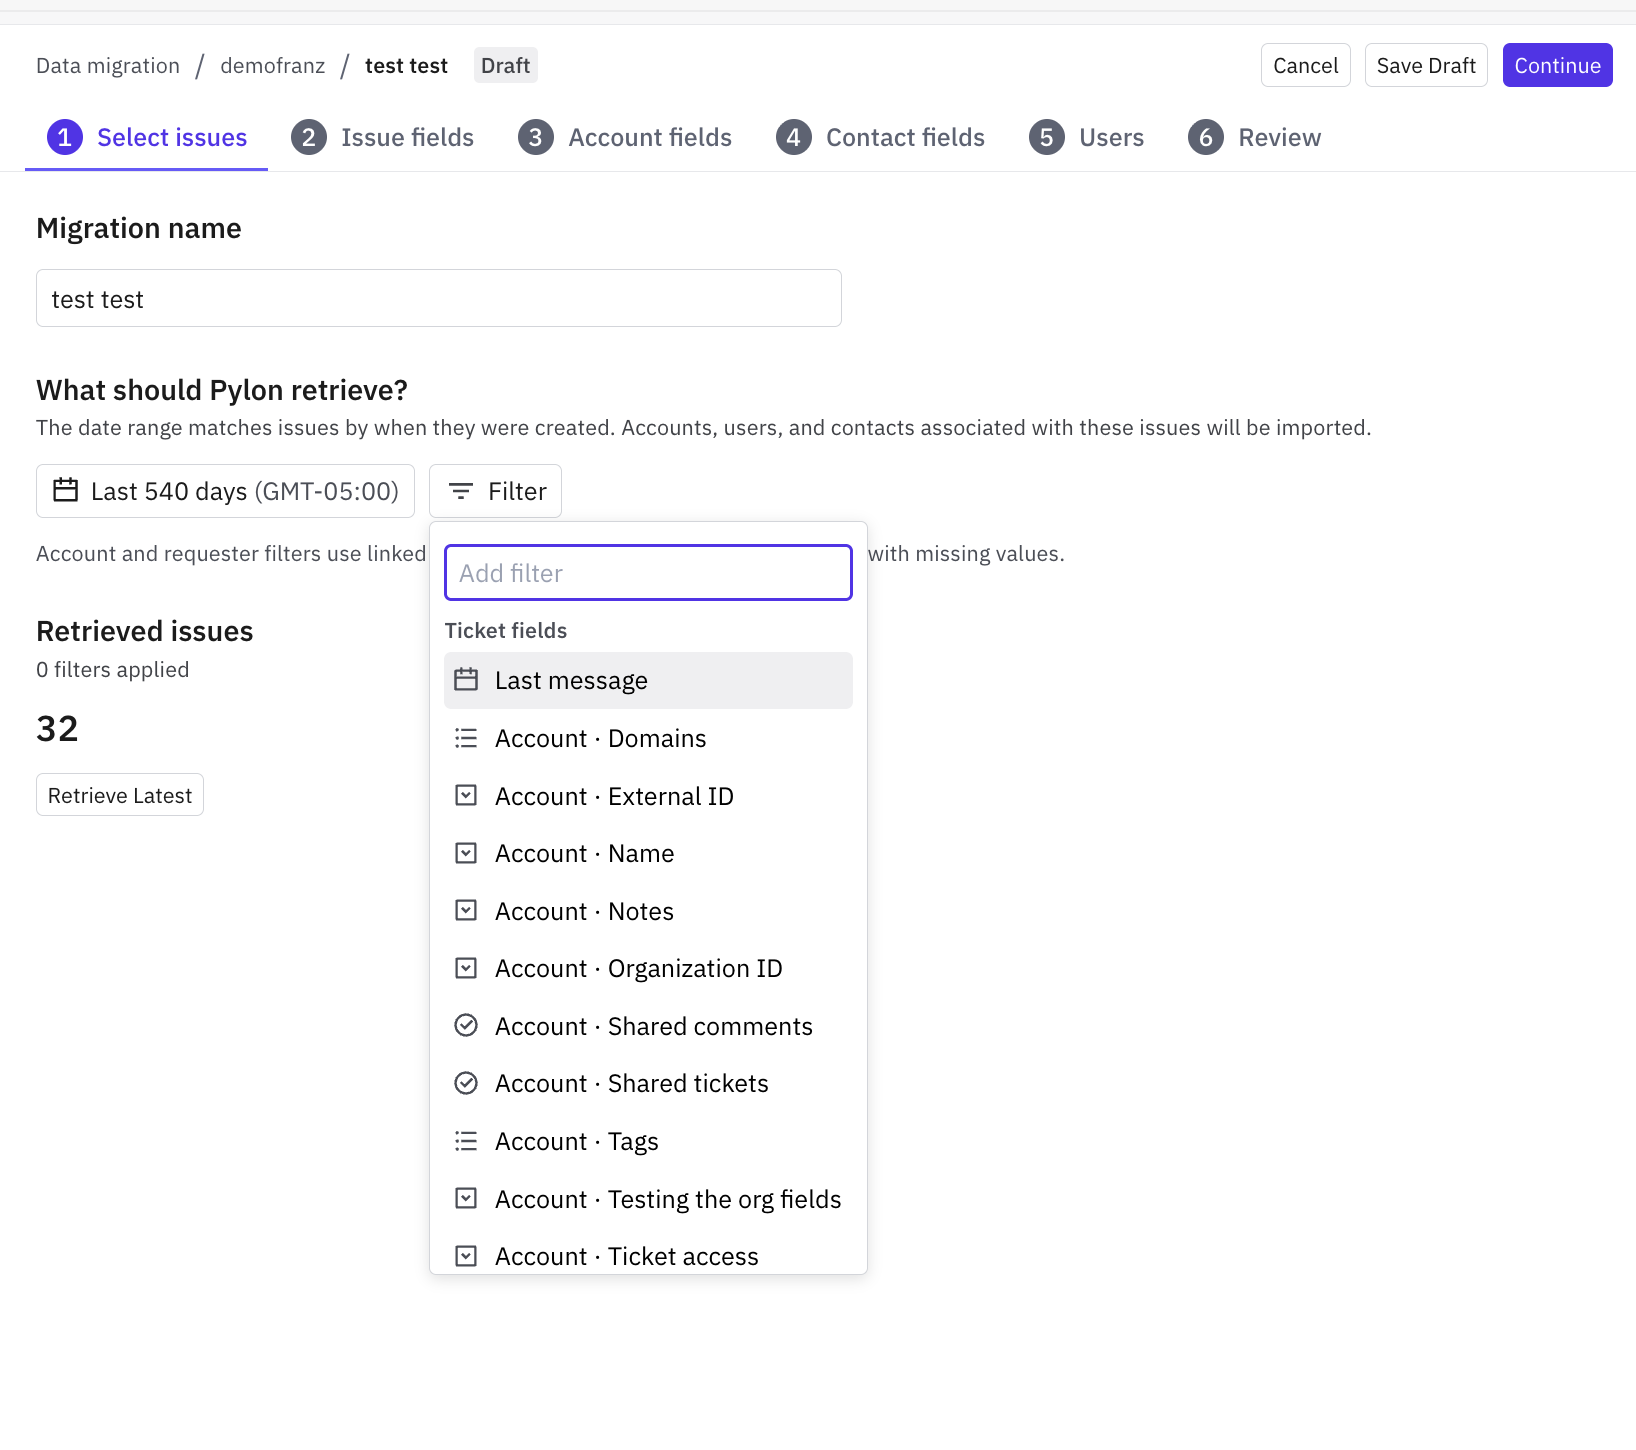
Click Filter to leave out tickets you don't need in Pylon, such as spam or test tickets (or any other not useful tickets that could harm AI capabilites). You can filter on ticket, account, and requester fields.
Check the Retrieved issues count, then click Continue.
We recommend importing max the last 2 years. Older tickets often describe how your product used to work, and Pylon's AI learns from everything you import. A shorter, relevant history keeps its answers accurate. If you need older tickets for audits or records, keep a full export from your old help desk (we recommend this anyways).
Pylon retrieves tickets in the background, which can take a while for a large help desk. Click Save Draft to come back later. Before you start your full import, hit Retrieve Latest to pull a fresh copy.
Step 3: Map your fields
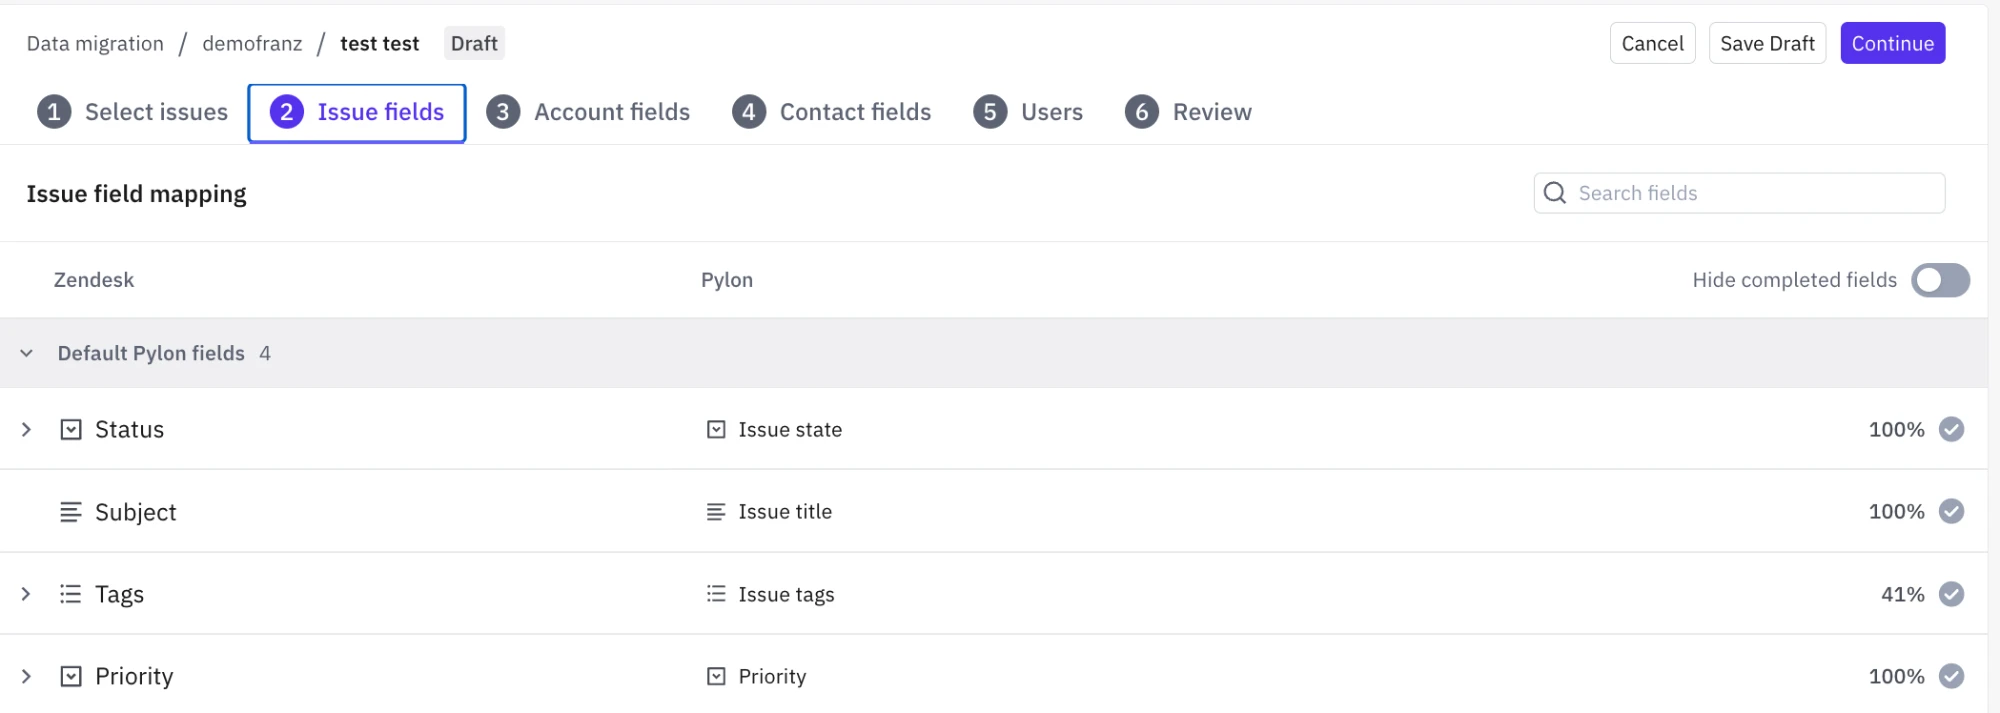
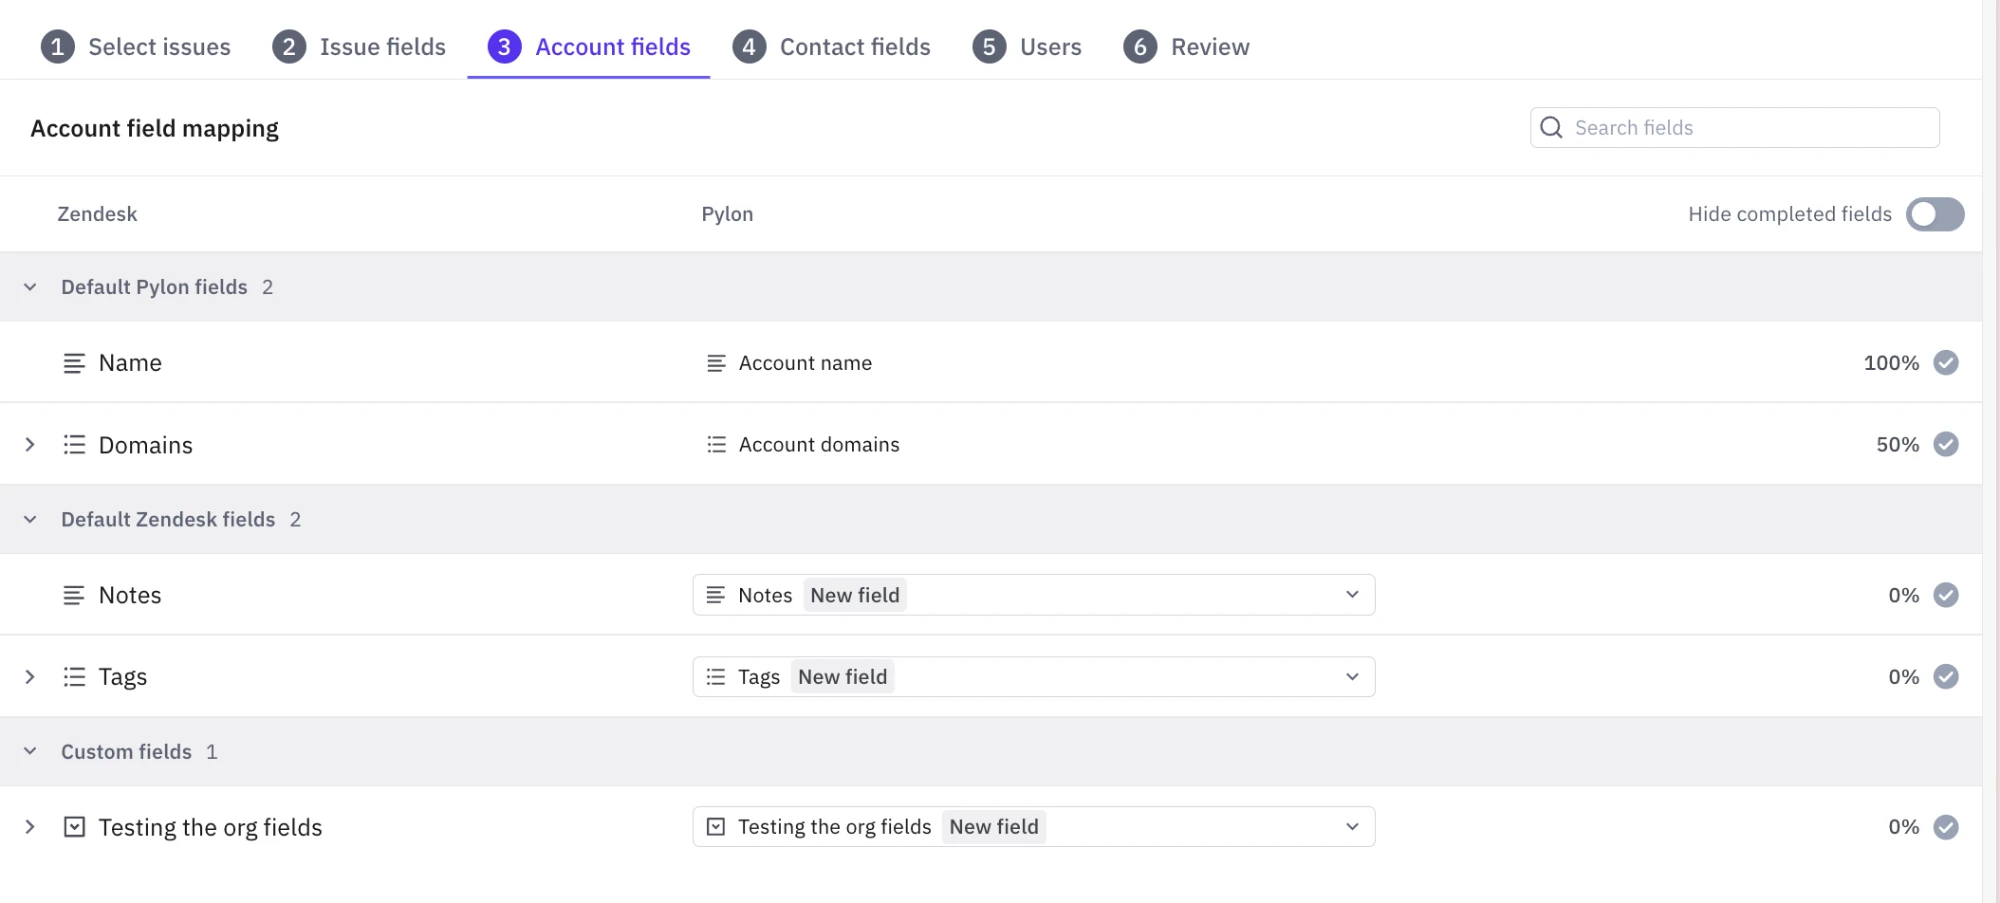
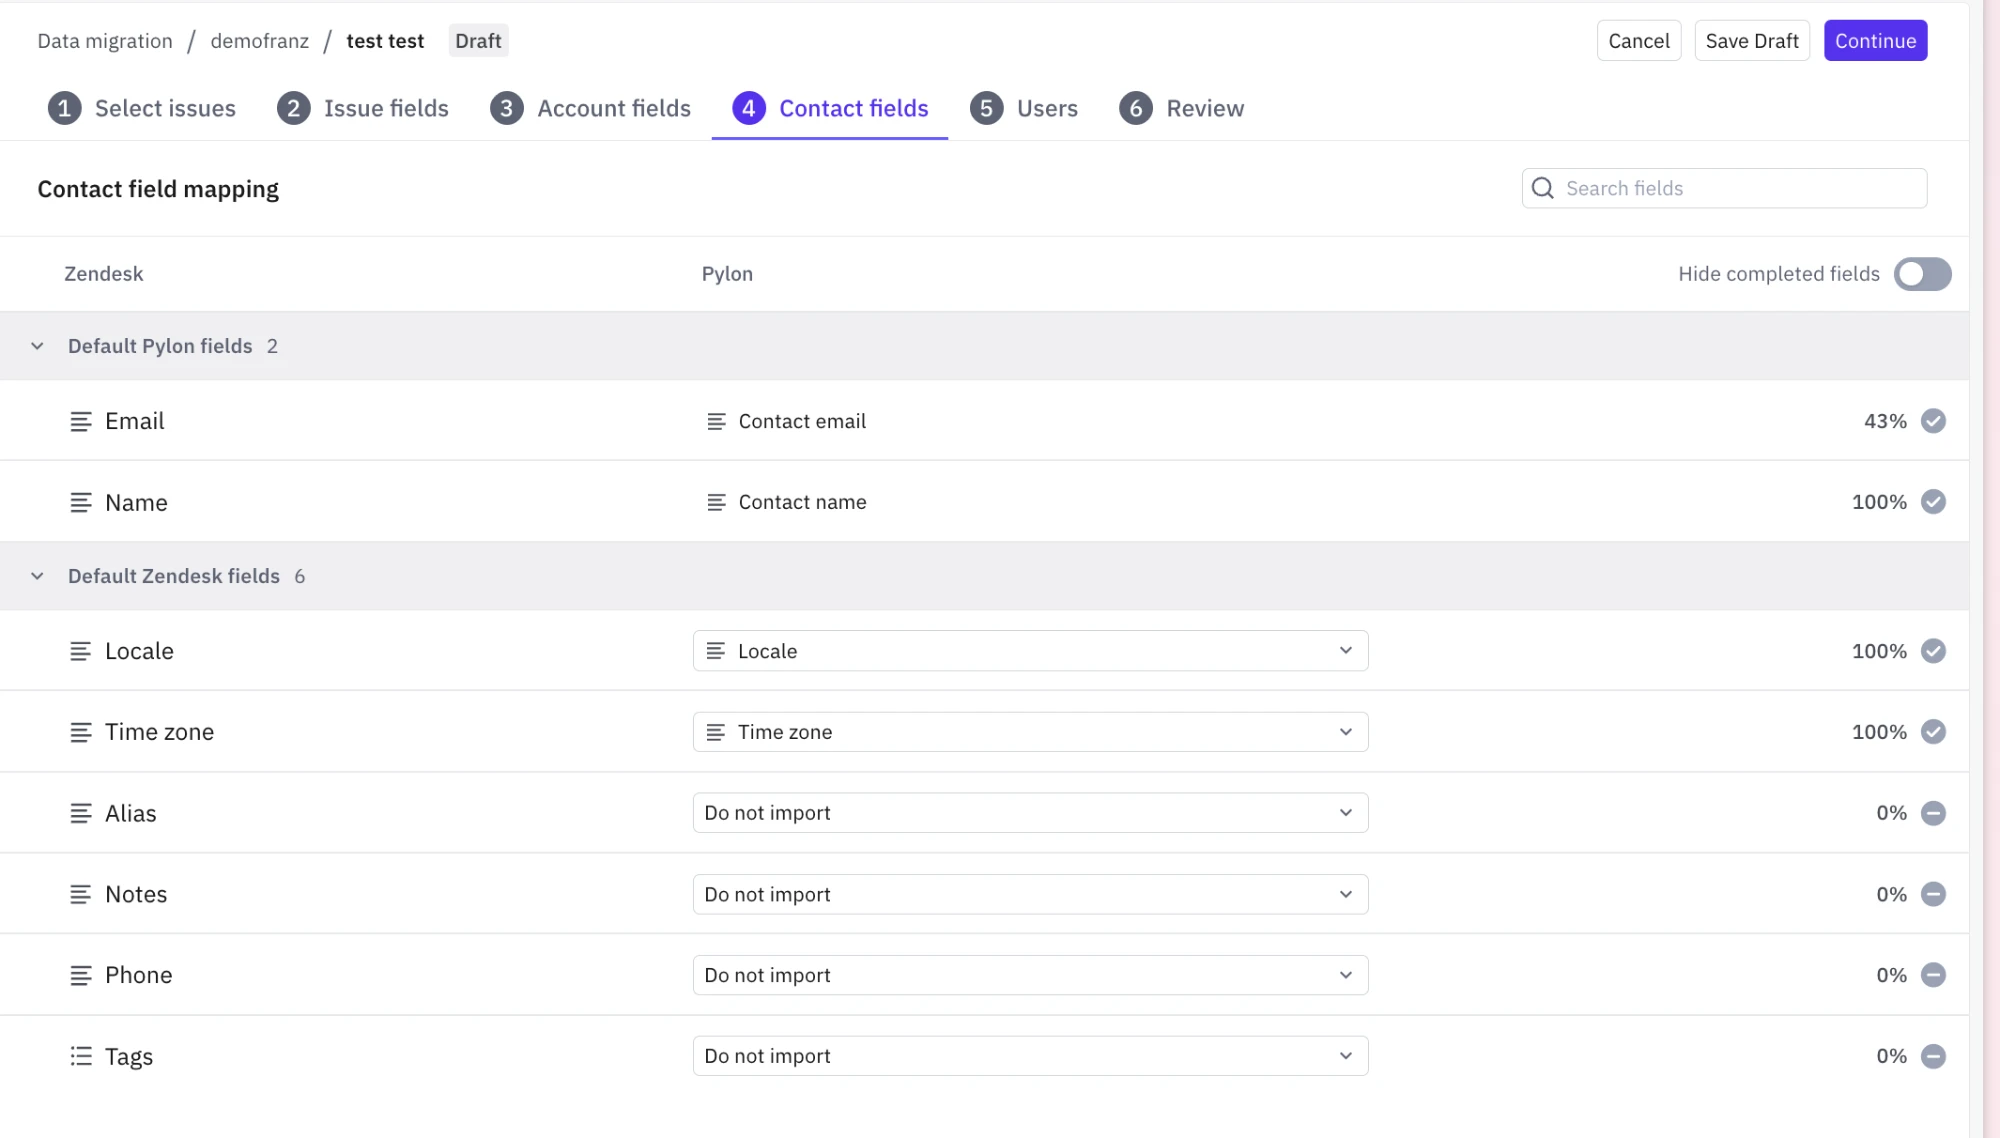
The Issue fields, Account fields, and Contact fields tabs list every field from your old help desk. For each one, choose where it goes:
An existing Pylon field. Core fields such as status, subject, priority, and tags are mapped for you.
A new field. Fields marked New field are created in Pylon during the import - including their specified options .
Do not import. The field stays behind.
The percentage next to each field shows how many retrieved records have a value for it (this is a great data point to evaluate if you really need that field in your new system! We don't want to import flawed and suboptimal fields from the legacy tool - migration to Pylon is a great opportunity to start fresh, especialy given all our AI capabilities). Expand a field to map its values, for example, your old statuses to Pylon issue states. Turn on Hide completed fields to see only what's left.
Only bring over fields your team will keep using or that an automation needs. Every extra field adds clutter to your issue and account views.
On the Users tab, choose what happens to each agent from your old help desk: match them to an existing Pylon user, choose Invite user to give them a Pylon login, or choose Import as deactivated for people who won't use Pylon. Importing itself doesn't send invite emails.
Step 4: Tag the imported tickets
This step and the next are on the Review tab.
Tag every imported issue is filled in for you from the help desk and migration name, for example migration-zendesk-q4-backfill. Change it if you like, and check Create global [tag] tag view so your whole team can find the imported tickets in one view.
Step 5: Review the preview
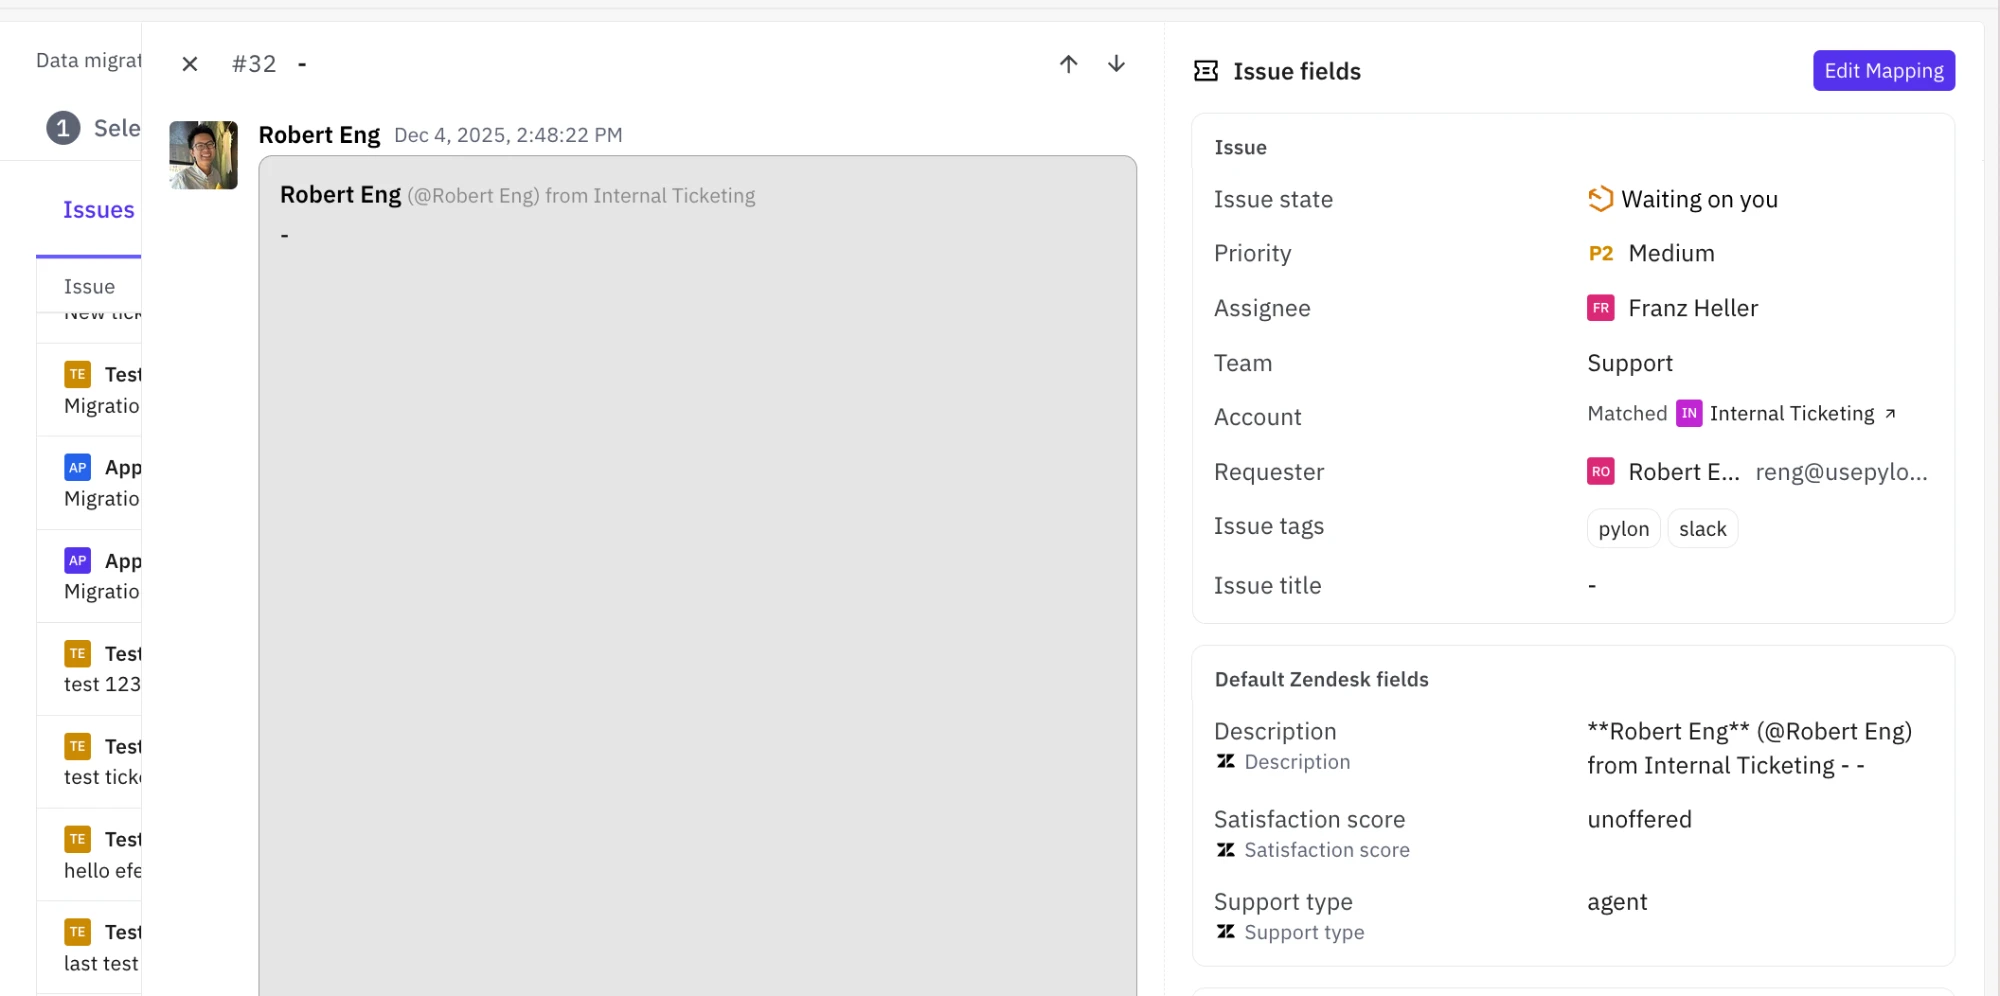
Spot-check issues. Open a few old and recent issues and check the conversation, status, priority, assignee, account, and requester.
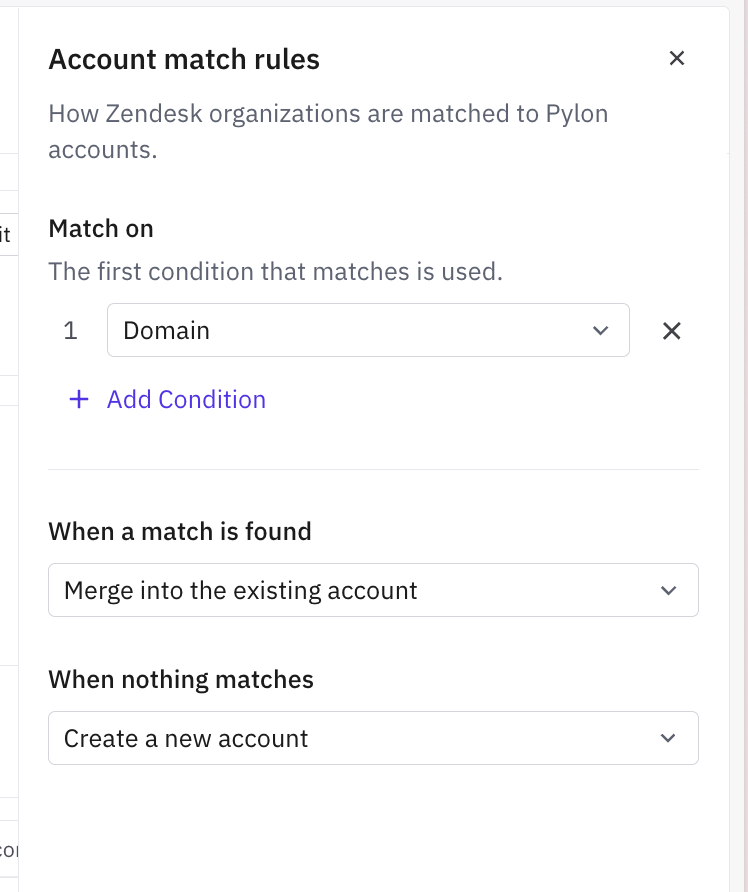
Check matching. Click Edit Match Rules on the Accounts or Contacts card to control how imported records line up with records already in Pylon. Accounts usually match on domain, and you can add conditions such as an external ID. The first condition that matches is used. Then choose what happens when a match is found (merge, overwrite, or skip) and when nothing matches (create a new record or skip). This is especially important if you have existing data in Pylon (i.e. through a CRM sync).
Fix anything that looks off. Click Edit Mapping to go back to the mapping.
Step 6: Start the import
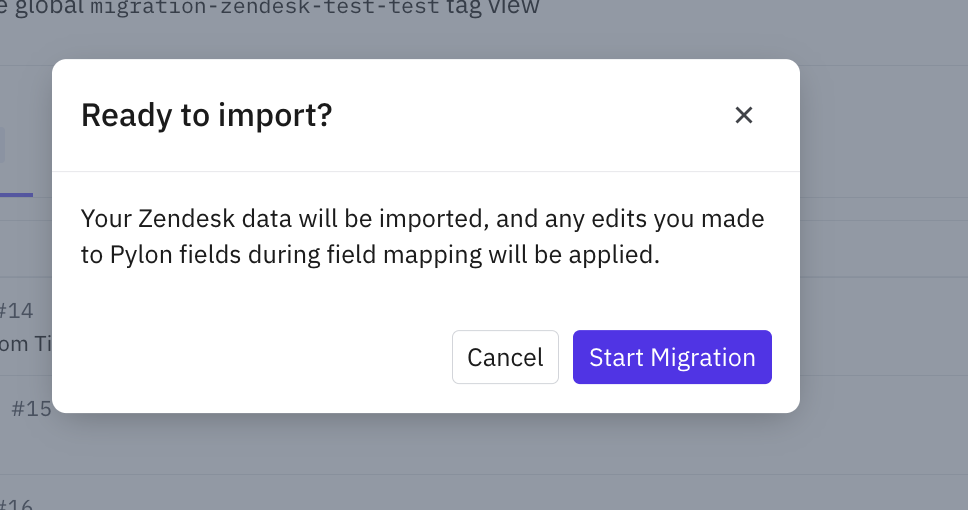
When the preview looks right, continue and confirm with Start Migration. The import runs in the background.
When it's done, the Results tab shows what happened to every issue, account, contact, and user, and links to your tag view.
What an import does
Tickets become Pylon issues with their full conversation and attachments. Public replies stay customer-facing, and internal comments become internal notes.
Issues keep their original created date, status, priority, assignee, and tags, plus any fields you mapped.
Organizations or companies become accounts, customers become contacts, and agents become users, based on your match rules and the Users tab.
If you use the customer portal, imported issues whose first message was public can show there, like other tickets.
What an import won't do
Message your customers. No replies, emails, or customer portal invites go out.
Run your automations. Triggers, notifications, AI automations, and CRM syncs don't run on imported records.
Reopen conversations. Imported tickets are read-only history, so you can't reply to them from Pylon. You can still add internal notes.
After the import
Why some tickets are skipped
A skipped ticket isn't an error. Pylon skips a ticket when:
An earlier import from the same help desk already brought it over.
It's already a live ticket in your workspace. The results show "Your workspace already works this ticket."
It has no conversation to import.
Reach out to the us if you are experienccing issues
Importing newer tickets later
To bring over tickets created since your last import, for example right before you switch to Pylon, choose Duplicate migration on the import in Settings > Data migration and retrieve again. Tickets you already imported are skipped, so nothing is duplicated.
Removing an import
Contact Pylon support if you need to remove the tickets an import created.